


We may receive a commission when you use our affiliate links. However, this does not impact our recommendations.

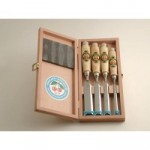
Here is a breaker installed less than half a millimeter from the cutting edge. Look closely. The line under the cutting edge is secondary bevel on the chipbreaker.
I have always disliked chipbreakers, which clog a handplane all too easily. But tonight I dislike them a little less.
After the recent spate of discussions about a series of Japanese films on chipbreakers (here is the complete and translated film) and some encouragement from woodworker David Charlesworth, I decided to experiment with the position of the chipbreaker on my bench planes.
The result was incredibly impressive. But I’m getting ahead of myself. First, a bit of history and theory.
Planes didn’t always have chipbreakers, and they did a fine job of making some of the most beautiful high-end furniture in the Western world. But after their advent, writers sang their praises on a regular basis as a great improvement.
I never understood it. According to early books, you set the tool’s chipbreaker close to the cutting edge of your handplane, presumably to help reduce tearing. When I first started using planes, I followed those instructions, but I didn’t see much benefit. What I did experience was a lot of clogging.
So I backed the chipbreaker away from the edge (about 3/32″) and focused on other ways to reduce tearing – the cutter’s sharpness, a tight mouth and the angle the edge was presented to the wood.
The recent discussion of the Japanese films (which are not new), made it clear to everyone with an Internet connection that the chipbreaker had to be a lot closer to the cutting edge than I ever suspected. How close? The answer is itself a question: How close can you get it?
Today I explained these ideas to a class of students I am teaching at the Dictum GmbH school of woodworking in Germany and asked all of them to help me examine this idea by setting their breakers as close as possible to the cutting edge.
We set them by screwing them down tight and tapping them forward with a hammer – getting as close as we dared or as our eyesight would allow.
The first results were interesting. The shavings we produced were surprisingly crinkled. Bengt Nilsson, a colleague of mine in the class, produced shavings on bubinga that looked like smashed up bacon.

With our first experiments with chipbreakers on Tuesday the bubinga shavings came out looking like cooked bacon.
But the surfaces of the wood looked nice. Other students had similar success – with no real tearing on a wide variety of species, everything from Scots pine to walnut to oak to beech to the bubinga. And this success was regardless of grain direction.
Not satisfied, I took my chipbreaker to the sharpening room and honed a 50° secondary bevel on my chipbreaker. I polished it to #8,000 grit as well (why not?).
That changed everything in the way the shavings looked. Instead of looking like a crinkle fry with a case of the bends, the shavings flew out of the mouth with a minimal amount of distortion. The surface of the wood looked as good as ever. Even on knots, reversed-grain bubinga, quartered and messed-up oak – you name it – the results were very good.
And this was in planes of all sorts, from a Groz try plane to a Veritas jack (bevel down), to a Kunz smoother, to a Lie-Nielsen No. 4. Plus other sizes of all these brands. The only plane that resisted the tuning was a Lie-Nielsen No. 6. With the breaker set that close, the blade-adjustment dog kept slipping out of the breaker. A new breaker would fix that in a heartbeat.
Pieces of wood that I had been scraping the day before were easily planed with the tight chipbreaker setup. The only change in the setup was the position of the breaker.
Of course, I need to do more work at home on woods that are even nastier (roey mahogany comes to mind). But count me as seriously impressed. Give it a try in your shop. It’s a five-minute modification that might change the way you set up your handplanes for the rest of your days.
— Christopher Schwarz
Now I might to update my book “Handplane Essentials,” which deals with all aspects of these tools. The book is still a good resource for learning to sharpen, tune and use all sorts of planes. It’s hardbound and printed in the USA.
Here are some supplies and tools we find essential in our everyday work around the shop. We may receive a commission from sales referred by our links; however, we have carefully selected these products for their usefulness and quality.


Thanks Chris. Very interesting post. I love hand planes (metal and wood) and have built quite a few wooden planes myself, but the chip breaker has always been akward. I think it is time I play around with the settings a little more and try your method of honing. Wish me luck!
Chris Adkins
I learned the benefits of a tightly set cap iron some years ago while following a group of Galoots on the old tools mail list. These guys were expeimenting with cap iron and mouth settings in an effort to reduce tearout. During the discussion one guy mentioned that if he had his cap iron set extremely close to the cutting edge he could plane in any direction regardless of the mouth opening. This opened my eyes. I tried it and since then I have been using this info and rarely adjusting my mouth settings.
Now I need to experiment with the cap iron bevel.
I have just discovered that this works well on end grain so long as the cut is kept to a minimum.
I was the lone American sub-flunky for two repair/renovation projects at the Japanese House here in Philadelphia (the curious can search http://www.shofuso.com) and got to spend over three months total with the carpenters from Japan. In 1999, the Hinoki bark roof was replaced and in 2007, some of the veranda (2 1/2″ thick Hinoki boards) and sliding doors were replaced.
In 1999, one of the roofers gave me a woodworking tool book–if I remember, the title translated to something like “Saw, Plane, Chisel.” ISBN 4844534815. A few fun facts from this book relevant to this discussion:
1. Two main bedding angles for Japanese plane blades are 45 degrees and 38 degrees 41′.
2. Most plane blades are sharpened at between 28 and 29 degrees. There was much more in the explanation, but it took me forever to get that much confirmed in translation.
3. Chip breakers get a secondary bevel of 70 degrees.
For what it’s worth, the lead carpenter in 2007 told me he puts an 80 degree bevel on his chip breakers.
My philosophy? If the throat is clogging, that’s the plane’s way of telling me to back off the blade.
Hope others find this useful,
Bruce
Excuse my ignorance and bad eyesight, but in Kees’ video, I can’t tell which side of the cap iron is getting the bevel. From the angle he’s holding the cap on the stone, I assume that he’s putting the back bevel on the underside (the side without the “curve’ for lack of a better term). Is that correct?
When you still have questions about how exactly you can turn your Groz plane into a Supersmoother, I’ve made a youtube video to show just that. It’s not a very elegant video, but it shows all the important steps.
http://www.youtube.com/watch?v=pSjpzta0FuY
In the film, with the higher angle chip breaker (80 degrees) at 1mm from the edge, the blade assembly looks a lot like the profile of a well burnished cabinet scraper. Hmm…
“Chipbreakers” or “cap irons” serve several purposes – not least in the Bailey-style adjuster design, they mate to the adjustment mechanism, and this required functionality can limit your range of options for positioning the breaker. But if you set it *really* *really* close to the cutting edge it effectively becomes part of the iron itself, at least from a geometry/wedge action point of view. So basically what you’ve got is equivalent to a back-bevel or high-angle frog. Not surprising really that this helps reduce tearout.
Hi Chris,
I always appreciate your inquisitive approach and reexamination of everyday woodworking issues.
The main effect of the “chipbreaker” is to pre-tension the bevel-down cutting edge, which is otherwise subject to flutter because it is unsupported. It also adds some mass. When properly profiled, it redirects the shaving and prevents it from jamming.
I wonder, especially for very thin shavings, if it really “breaks” the chip at all. That must be happening in the first few thousandths of an inch at the wood surface, at the very edge of the blade, before the shaving meets the “chipbreaker,” assuming the blade is very sharp.
In any case, I agree that setting it close to the cutting edge is helpful.
Imagine cutting something with a thin, wide razor blade. One’s first instinct would be to hold it (safely) near its cutting edge, stabilizing the edge just like the disposable cartridges in shaving razors.
Rob Porcaro
Can’t wait to try it.
How about NO chip breaker – i.e. setting the chip breaker high.
All it does is hold the blade down. Think wooden hand plane.
Just use a thick stiff blade. You really did not explore this.
Bones
Cutting edge work. I despair that we’re in some lite version the dark ages when lost innovations are revealed like this. Well done!
So–crown your chipbreaker to conform to your smoother iron?
At a class with Chuck Bender he recommended a 1/16th of an inch, though he never actually measured the gap. I always set it as close as possible. I’ve never had a problem with the finished product though I do admit that the chip breaker does get clogged on occasion.
Glad you like it Chris. When I “discovered” the proper use of the capiron for myself I thought: Everybody who owns a double iron plane should know about this. It is THE method to squeeze the maximum performance from your plane.
That’s why I made an instructional video on youtube about the capiron and tearout. And that’s why I emailed you last week. I thought (cunningly), if I can drag Chris Schwarz into this, the news will spread a lot faster.
Well, the voyage now only begins. The sky is the limit. With increasing experience you will find the capiron can do everything, even worldpeace (maybe that’s a little bit exagerated).
Have fun in Germany. We’re looking forward to some funny video’s again.
In your experiments with the class, does the pitch of the frog influence the size of the secondary bevel on the chip breaker; or, is the secondary bevel based off of the bevel on the iron?
Ahhh, life… the crappiest of teachers. The test first and the lesson later.
I suffered with my first hand plane. It clogged, it choked, it chattered BAD no matter what I did. It was an old piece of Stanley crap (Handyman) that I tried to tune till I realized I was flogging the proverbial deceased equine.
Jump ahead two weeks and tuning up a type 11 and replacing the iron/chip breaker combo with a Hock/Clifton Stay-Set was an absolute epiphany. You have to tune the two-piece chip breaker to fit your plane and wowsa did that do the job. I can set the chip breaker to a skinny 1/32″ or less and work the hard stuff as long as the blade stays sharp. And it NEVER chokes. The beauty of the Stay-Set is that it makes it easy to get back to work as you don’t have to remove the body of the cap iron to whet the edge of the blade. Also, the Clifton comes fairly polished and after a few dozen strokes on some wet/dry, a fly will bust his tail if it dares try to land on it. Wood shavings do the same. Lovely curls free from wrinkles.
Chris, I count you among the best writing about the working of wood because you (like myself) amend what you have known for what you discover. Bravo, bubba. Keep on discovering.
Oh, and sharing.
I admire your integrity in re-examining chipbreakers in the light of newly-presented evidence (it’s nothing really ‘new’, of course), and hope that others who’ve propogated misinformation, whether through ignorance or self-interest, step up and do likewise.
What’s the difference between a plane iron & chip breaker where the plane iron has a back bevel and the chip breaker is set very close to the edge and a very, very thick plane iron with a double bevel?
Chris,
Good stuff. Useful to have so much input.
David Charlesworth
I had the same problem with my LN 5.5 as you did with your six. We had a discussion about it over on Sawmill Creek.
http://www.sawmillcreek.org/showthread.php?186156-cap-iron-adjustments-%28-like-in-the-japanese-video-%29-wont-let-my-LN-blade-protrude
I’m very new at this so my range of experience is severely limited. I was planing the top edge of a thick wooden fire rated door while standing on a case of copier paper set on end. I had the chip breaker on a Stanley #3 set extremely close to the edge of the iron and found the plane would not cut as it was clogging badly with shavings being forced in between the chip breaker and the iron. When I backed the chip breaker about 3/16″ away from the edge it cut just fine without clogging.
I’ve done just this for a little over a year now on my jack. Not that I’m so smart, I just didn’t know any better. My real improvement came when I flattened the side of the chip breaker which contacts the blade. I just gave it the same treatment I gave the blade – again, I didn’t know better.